Top 10 Transcription Tips

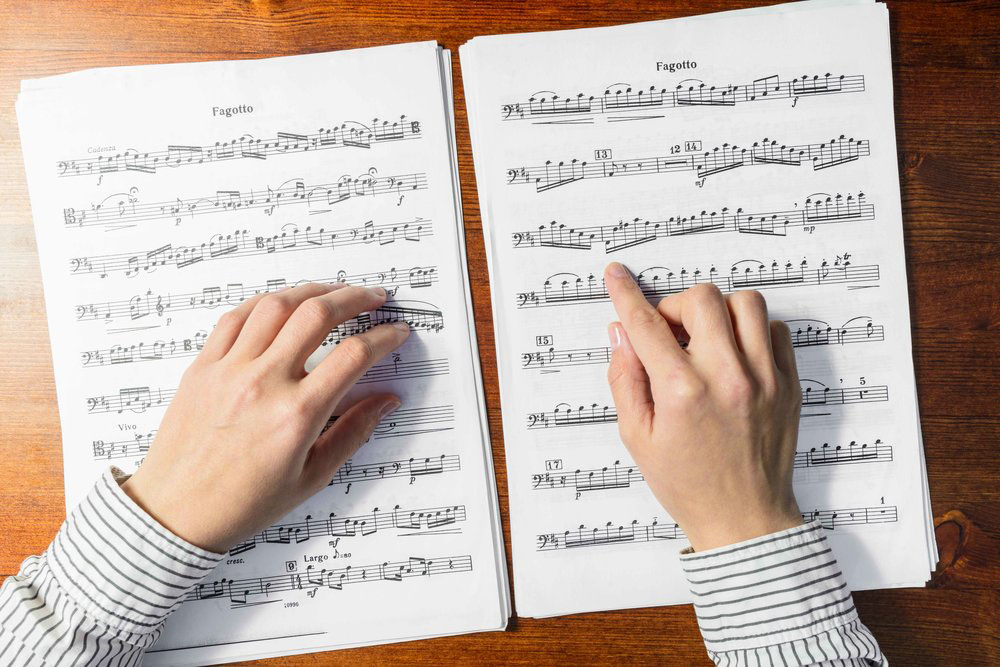
Music transcription, also known as dictation, or simply writing-what-you-hear, is the art of notating music entirely by ear. Many musicians love to transcribe, while many musicians cringe and shudder, remembering music theory class and failed attempts at transcribing four minute bebop solos on the first attempt. Despite its dreadful reputation, transcribing is helpful for all musicians: performers, students, educators, and beginners alike. The skills that transcribing strengthens and the sheet music that can be produced are always worth the effort of transcribing!

There are a lot of transcription assistant tools out there to help you transcribe faster and more accurately, either by slowing down the recording, changing the pitch, looping sections, and even analysing the notes in a chord. We recommend Transcribe! as our software of choice for assisting you when transcribing.

At Black Note Transcriptions, we understand the struggle and the frustration that comes with needing sheet music ASAP. After years and years (and years) of practice, we finally feel confident in our skills.

We want you to gain the same confidence. Here are our top 10 tips for transcribing:

1. Start at your skill level

This might seem obvious, but like all learned skills and trades, you need to start practising at a basic level. If you’ve never transcribed any music before, starting with John Coltrane’s solo on Giant Steps or Hiatus Kaiyote’s Molasses will only lead to one result: you will hate transcribing, give up, and likely not try it again.

Here’s how to start as a beginner:

  • Practice with a friend. Ask someone to play some very simple, short melodies on an instrument. Practice transcribing their short, simple melodies. Swap out and give them some basic melodies in return.
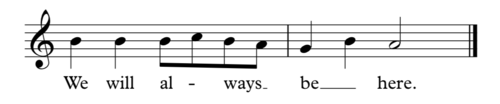
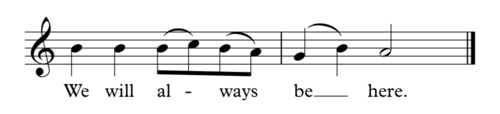
  • Try transcribing some melodies that you already have memorised. Think simply; songs like Happy Birthday, nursery rhymes, and your favourite children’s’ songs are good places to start.
  • Work on transcribing notes or rhythms separately until you feel confident to start transcribing them together. For example, you can transcribe the notes your friend plays for you as just simple dots on a page – no rhythm necessary. Alternatively, your friend can clap rhythms for you to notate, but make sure they stick to a time signature and keep a steady beat!

Starting simply won’t just help you build the foundation of your skills; it will gradually grow your confidence and enjoyment of transcribing.

2. Get the rhythm down first

If you’re struggling to notate both the notes and the rhythms at the same time, figure out the rhythm first. For example, if I want to notate the melody to Happy Birthday, but I’m struggling to work it out, I can first identify the rhythm and write it down separately. Then, I can listen to the passage again, this time only focusing on the notes that are being played. Simplifying and breaking down a passage into as many small, digestible variables and traits as I can is a tremendously helpful way to process information and eventually produce it as a complete transcription.

Happy Birthday – rhythm only
Happy Birthday – now with the correct notes!

3.  Count while listening

If you’re struggling with transcribing a rhythm, try counting the beats out loud with your audio recording. This will help you identify where exactly a certain note falls in the measure, and it can solidify any doubts you may have about the time signature. If you incorrectly assume the time signature, you will quickly become aware of your error while counting out loud.

. Slow it down

If you listen to music on YouTube, you can slow down the speed here on the bottom right corner

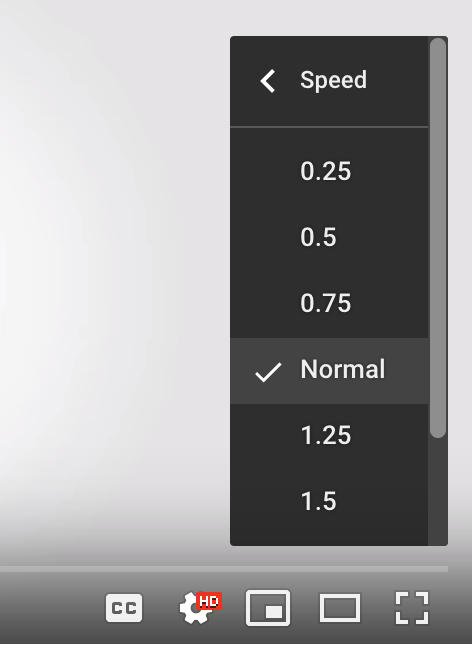
This is not cheating! If you are transcribing, it’s okay to slow down your audio during the transcription and proofreading processes. Some music transcriptionists slow down everything all the time, while others swear they’ve never altered a recording during the notation process. This tool can greatly help you with suggestion #1: starting small and simple. Slowing down your music can make the process much more appropriate and realistic for beginners. Common slow down tools include The Amazing Slow Downer, iRehearse, and even YouTube. Yes, on Youtube, videos can be altered to play at a fraction of the speed.

5. Map out the form

Having a template in which to insert your transcription can be extraordinarily helpful. Imagine this; you’re transcribing a 12-bar blues jazz solo, and you’re continuously stuck on bars 3 and 4. Bars 1 and 2 are simple, bars 5 and 6 are all rests, and bar 7-12 are super easy for you. Rather than waiting on your progress in bar 3 and 4 to move on, use what you know to make progress. Map out 12 measures, 3 lines of 4 measures each, and input what you know. Maybe you know the changes for the 12 bar blues – great. Write them in. Write in how bar 5 and 6 are all rests. Tackle bars 1,2, 7-12, the “easy” ones. Now, bars 3 and 4 are sitting blank on your template, and you can finish those when you’re ready. Giving up on a project after hearing a frustratingly difficult measure is a common mistake that you don’t have to make. Use your resources and your knowledge to complete your transcription to your best ability, and then fill in the missing pieces.

6. Use software that lets you playback your transcription

The use of notation software is a hot topic amongst transcriptionists. For the modern musician, using notation software is a game-changer. Very few musicians these days will want to read your hand-written parts, and you will spend countless hours writing out separate parts, transposing, or rewriting any handwritten music.

Transcriptions on notation software are a different story, though, since most notation software plays the note as you input it onto your score. This is very different from transcribing by hand, where you are relying only on your musical knowledge, your instrument, and your ear. Many transcribers believe that hearing notes as you input them is cheating, and maybe they are right. However, if you are transcribing for efficiency, and not just to push yourself into a hardcore ear training boot camp, then using notation software is extremely acceptable. Don’t get me wrong, transcribing is extremely challenging even with the aid of notation software! Software is helpful during the process not only for its note-by-note inputting playback, but also for the overall score playback that you can use. Free notation software includes: Noteflight, MuseScoreFor a fee or subscription, you can use these programs: Sibelius, Finale, Dorico, etc.

7. Use an instrument

If you have one nearby, have the skills, and feel confident to do so, use an instrument while transcribing. Most transcribers swear by the use of their instrument to help them digest musical passages. We suggest trying your daily transcription practice both ways, and deciding what works best for you.

8. Sight-read/sight-sing daily

IMAGE 5 (1).png

We firmly believe that sight-reading skills and transcription skills go hand-in-hand. Why?

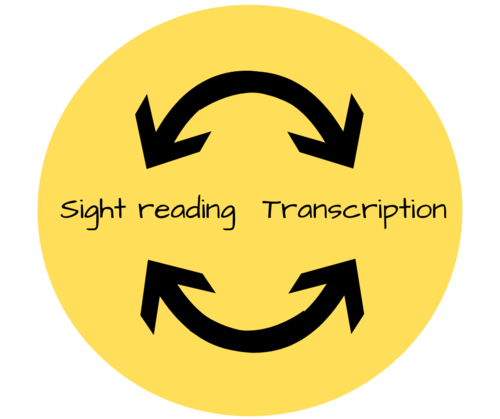
Sight reading is the learned skill in which musicians can quickly relate a visual cue into an audio response. Some instrumentalists hear the note on the page before their fingers react to play it,  while others only rely on their physical reaction. Not sure which category you fall under? Try sight-singing. Sight singing is the true test of your sight reading abilities. If a musician can see a visual cue (notes on the page) and hear the sound associated with those notes, (able to sing them without help), then they have the sight reading ability that is most helpful during transcribing. The process of transcription follows the opposite process as sight reading. During sight reading we take visual cues and mentally turn them into audio; during transcription, we take audio cues and mentally turn them into visuals. The more you can strengthen these visual-audio connections through sight reading (preferably sight-singing), the stronger your transcription skills will become.

9. Take Breaks

Fresh eyes and fresh ears are essential for some of your tougher transcriptions. It’s always a good idea to take a break when you start to become overwhelmed, frustrated, cross-eyed, or if you just aren’t making smart progress on your project. Come back in 10 minutes, 1 day, or 1 week, and you will see and hear your work in a new way. Taking breaks is healthy, and they are well worth your time if the alternative is to make tired mistakes.

10. Do it every day

Like with most taught skills, improvement in transcribing takes consistent practice over a long period of time. You may find that it comes easy for you – great! Use your talent to refine your skills to a greater level. Maybe transcribing is your nightmare; we understand that as well. Keep it up! Make a goal to transcribe something daily, whether it’s one short song, one jazz solo, or just one simple rhythm. Think you don’t have time? Start visualising rhythms to popular melodies you listen to on your way to work. Take a passage from a piece that you hear your best friend working on and transcribe the melody by ear. You will see improvements, and eventually, you will learn to love the process. You will start to see improvements in other musical areas as well; your sight reading, ear training, intonation, and awareness of other musicians will skyrocket. Keep it up, and as always, if you need a little extra help, give us a shout.

3 Steps To Improve Your Rehearsals: Preparation

Your preparation and organisation are forms of respect shown to your students and musicians. Your effort in preparation tells them that you respect their time, you’ve put thought into the time you’ll spend together, and that you don’t want to waste a single minute of your precious music-making time together.

1. Prepare Your Materials

This tip might seem obvious, but you’d be surprised how often ensemble leaders arrive at rehearsals without materials for their musicians. Prepare your music by having everything printed, sorted, taped, marked, and ready for your musicians well before the rehearsal starts. Every teacher and group leader has made the mistake of forgetting to prepare something and needing to make a quick errand during rehearsal time, but try to avoid making that mistake.

2. Prepare Your Rehearsal Goals

Preparing your desired goals of every rehearsal is a sure-fire way to make sure you are always growing and never floundering during a rehearsal. Prepare your goals, your activities to accomplish those goals, and any important information you need to tell your ensemble. Let your ensemble know what these goals are at the beginning of your rehearsal. They will feel appreciated and they will know what they need to work towards that day.

This is especially important for new ensemble leaders: prepare what you will say during your rehearsal. Any discomfort or awkwardness that you carry will amplify once you are in front of your ensemble. Have some cheat notes to rely on in case you get flustered and need to get back on track. If you’re extremely uncomfortable, practice beginning your rehearsal in front of a mirror, a camera, or some friends to ease the tension.

3. Prepare Your Musicians

Prepare your musicians with your expectations of the rehearsal. If you’re expecting them to practice the music before arriving, make sure to give them the appropriate materials (music, reference recordings, etc.) and make your expectations very clear. Ensure that everyone knows the exact days and times of your rehearsals, including how long rehearsals will run. If your musicians arrive at a rehearsal and find out it will run 2 hours longer expected, it will feel like a slap in the face. Respect your musicians’ time and prepare them in every way for a successful rehearsal.

3 Steps To Improve Your Rehearsals: Engagement

As a leader, you understand how precious rehearsal time can be. So often, we feel like we don’t have enough time to perfect our music to meet our goals. Even worse, if your musicians aren’t receptive to your leadership style, you’ll feel like you’re wasting time. How can you achieve all of your rehearsal goals if your musicians simply aren’t interested or invested in your rehearsals? You can better engage your musicians in three simple ways:

1. Engage with pace

Make sure you’re moving your rehearsals at a pace that is understood by all of your musicians. If you speak or move through material too quickly, your musicians might become confused, overwhelmed, or begin to zone out. If you move too slowly, your musicians will get bored, distracted, and likely start feeling like they should talk or be on their phones to pass the time. Even worse, your musicians will feel that you don’t respect their time if the rehearsal is filled with a lot of goofing around.

2. Engage with activity

Don’t put your ensemble to sleep! Music is naturally engaging and participatory, but sometimes your musicians will feel very under-stimulated if they are not doing very much or if the continuous repetition becomes boring. Find ways to always keep everyone busy and active. Even if you need to work with just one person or one section of your group for a few minutes, give your other ensemble members a task to work on so that their time is not being wasted. Make sure to speak to and address all musicians during your rehearsals and give everyone the opportunity to address their confusions or questions at the end of the rehearsal.

3. Engage with understanding

To properly engage with your musicians, you need to understand them on at least a basic level. Put in the time to get to know them, their background, their skills, and their passions. When you get to know your musicians and start leading with their individual personalities and needs in mind, you will begin to show them that you are collaborating with them vs. just telling them what to do. Your musicians will feel respected, understood, and appreciated, leading them to focus on a deeper level and give more to your music.

How To Nail Your Audition

We’ve all been there: you have an exciting upcoming audition, you think you’re prepared, but something goes wrong. Maybe you don’t get a good response from the judges, or maybe you forgot something crucial in your preparation. No matter how many auditions you’ve had, these helpful tips will prepare you for all future opportunities!

1. Be Prepared

Repeat after me: you can’t cram your musical skills. Start your preparation as early as possible. You cannot be too prepared. Here are some tips for ultimate preparation:

Practice often, and practice intelligently (see our 14 Practice tips here)

  • Record yourself and analyse your performance. Listening to yourself play and sing can be a brutally eye-opening and painful experience. Do it anyway.
  • Perform your audition music for friends and family
  • Listen to your audition piece(s) daily. Make sure you are listening to the best possible performance recording available.
  • Memorise your music, especially if memorisation is a requirement. If it’s not a requirement, the panel will appreciate your extra preparation.
  • Make sure you are aware of all requirements. Are you required to bring copies of your music? Are you required to perform with accompaniment? What is the time limit of your audition?
  • Start your preparation early. Do you have a dream audition you’re aiming to win in 2 years? Great. Maybe the music is still out of reach, and that’s fine. Use this time to build your skills and focus on the distant goal. Your teacher can help you by pinpointing your weaknesses and planning a long-term approach to helping you strengthen those weak areas.

Don’t practice until you’re just good enough… prepare to the point where you are the best and only option in the eyes of the judges

2. Choose the right music

Audition music usually comes in 2 forms: either you get to choose the music (within set parameters), or the music is chosen for you. If the music is chosen for you, yay! You’ve already completed this part and you don’t need to make any decisions. Unfortunately, everyone else will be performing the same piece as you. If you are performing the same music as everyone else, you’ll need to make sure you’re as prepared as possible, since the judges will have a very easy way to compare your skills to all the other candidates.

If you get to choose the music, great! You have an amazing opportunity to pick music that compliments your strengths well.

Ask yourself these questions while choosing your music:

  • Does this music fit the requirements?

e.g. Does the audition call for one movement of a concerto but I am preparing a jazz standard?

  • Does this music fit my playing level?

Is it too hard/too easy?

  • Does this music compliment my strengths?

If you have an incredibly gorgeous high range, why would you choose a piece that only features your lowest notes? If double-tonguing is your #1 skill on the trumpet, choose a piece that features that skill.

  • Does this music highlight my weaknesses?

Maybe you have a new favourite piece that you’re just dying to perform. Be honest with yourself: does it show off your weaknesses? If so, save the piece for the practice room until your skills catch up with the difficulties of the piece.

  • Does this music fit the required time frame?

Many auditions will have time limits. If your audition doesn’t have a time limit, stay on the short side. Show your panel your very best skills and musicianship in a small window of time.

Think of it this way: the longer you play, the more likely you are to make a mistake. Plus, everyone appreciates brevity, especially when sitting through many hours of auditions. Leave the panel wanting more.

The right music can make or break your audition. Speak with your teacher or a colleague if you’re unsure about your audition music choice.

3. Dress appropriately and professionally

Dressing professionally can get you a long way. If you are auditioning for anything academic or professional, it’s especially important to dress your best for your performance. If you’re auditioning for American Idol or band chair placements at a 3-day summer camp, it’s not as urgent that you wear a dress or slacks and a tie. In all scenarios, you have the opportunity to show the panel that you are taking the audition seriously. If you are recording a video audition, consider that the judges don’t get the luxury of speaking with you to get their first impression. Their first subconscious impression of you (before they hear you perform) will generally be your appearance. Dress professionally, and make sure that your clothes are comfortable enough for performance.

4. Be Confident

Doesn’t this advice get old? It’s repeated ad nauseum for a reason; your confidence is infectious, exciting, and memorable. You don’t need to enter and be overly friendly and talkative to show confidence.

Here are some quick tips to help:

  • Watch your posture

Slouchy posture and bad stage presence show the audience a lack of confidence.

  • Make eye contact

Engage the audience and show them that you’re confident and enjoying making music.

  • Speak clearly and calmly

Stammering, mumbling, or talking way too much can all show nerves and a lack of confidence.

  • Show, don’t tell

If you’re feeling extremely confident, focus on doing your best. Don’t brag or act like a show-off; too much confidence leaves a sour impression.

5. Practice being Nervous

The only way to overcome debilitating nerves is to face them. Practice your performance for as many people as possible. The more you perform, the easier this will become. If you are nervous because you are unprepared, you will need to be more prepared before you will feel any better. Sorry, there’s no shortcut to preparation.

Also, nerves aren’t always a bad thing! Your nerves are creating a lot of energy in your body. Try to channel your nervous energy into positive performance energy. Whenever I feel shaky on stage, I focus on putting all of my nerves into my face, making myself come alive and sing with a lot of expression.

6. Know what you’re going to say

This situation happens about 200 times a day all across the world:

Judge: Hello, how are you?

Musician: ummmmmmmmmmmmmmmmm good

Judge: What’s your name?

Musician: ummmmmmmmmmmmmmmmmmmmmmmm Sarah

Judge: Great, what will you be playing for us today?

Musician: ummmmmmmmmmmmmmmmmmmmmmmmmmmm……

You get the picture.

Practice what you will say. Practice saying your name, polite responses, the title of your piece, the correct pronunciation of the composers/songwriters, etc.

Someday, you won’t need to practice what you’ll say. Until then, spend time perfecting your responses so they feel natural and confident.


7. Visualise

If you’ve prepared your music well enough, you have probably spent days with your music stuck in your head. You’ve also probably daydreamed about your audition, coating the experience with fear in your imagination. Do you ever think about your audition and picture yourself failing? Stop that. Stop that right now.

Close your eyes, and visualise your Best Case Scenario audition. You enter confidently and dressed professionally. You have your music in hand, or maybe it’s memorised. You can see the hall, the classroom, the video camera, or the office. You have a polite conversation with the judges where you flawlessly pronounce your pieces and their composers/songwriters. You perform – and it’s flawless. This is important: while you visualise your performance, visualise ALL of it. Hear every note of the performance, and “watch” yourself performing all the way until the very end. When you hear your performance, hear it played or sung with the most beautiful tone, crisp diction, clean articulation, and moving expression. Visualise yourself thanking the judges, leaving the room, and feeling great about your performance.

The first attempt of this visualisation might be challenging, but the more you visualise the same successful performance, the more likely you are to enter your audition with confidence and relentless positive focus. If you focus on all of the possible mistakes you could make, see yourself tripping, stuttering, fainting, etc., you will fear and feel those things during your performance. Why let those negative thoughts get in the way? Picture your dream audition consistently and you will make it happen.

8. Stay Healthy

Stay healthy. Be sure to get adequate sleep for the days leading up to your audition. Stay hydrated. Don’t try any new adventurous foods before your audition. If you get nervous, have some of your comfort foods nearby. (I always need Ritz crackers and a banana before I perform). Don’t drink alcohol the nights before your audition (especially if you’re underage). Set yourself up for success with what you consume. Performing music is a physical activity, and your body is depending on your care and love in order to function at its highest level.


9. Don’t Over-play/Over-sing

Take it easy! If you haven’t prepared enough, you might be tempted to practice a few extra hours the night before (or even the day of) your audition. Don’t go so hard that you injure, overwork, or strain yourself. Your panel will not care about your accuracy or speed if your voice is too strained to sing or if your lips are too sore to play.

9. Don’t Stress

Along the lines of staying healthy, don’t put too much stress on yourself for your audition. Certain kinds of stress can be extremely helpful when you are working towards an ambitious goal, but negative stress that causes anxiety, physical issues, or lack of sleep will not help you. Understand that if you’ve prepared to the best of your ability, then you have nothing to worry about. You might not get the result you want, but you’ll know that you’ve done your absolute best. Sometimes, audition results feel extremely unfair. And sometimes, they are! Understand that you are giving a stranger a snapshot of you; sometimes that brief snapshot isn’t your finest representation of what you can do. Sometimes it is, and the judge is just looking for something different.

3 Steps To Improve Your Rehearsals: Staying On Track

Imagine this: you have the perfect rehearsal planned, you are completely prepared and organised, and then during your rehearsal, some major distraction occurs. Distractions can arise in many forms, from talking, electronic use, interruptions, etc. Staying on-track in your next rehearsal is crucial for accomplishing all of your rehearsal goals. Follow these three quick steps to make sure your next rehearsal is as distraction-free as possible.

1. Stay on track with firm expectations with electronics

Whether you are a school teacher or an artist leading a band, you surely understand the detrimental effect of electronic use during rehearsals. To avoid the need to repeat everything you say and to maintain focus in your rehearsals, be very clear and firm with your expectations on electronic usage. You’ll never be able to eradicate it completely unless you’re extremely strict, but if you establish a strong level of mutual respect from the beginning, your musicians will not want to disappoint or disrespect you with their electronics.

2. Stay on track with good pacing

Many rehearsals fall off track simply because the leader is not moving quickly enough. Make sure that your rehearsal has enough forward momentum so that there is no room for anyone to get side-tracked. If there is a lot of time during the rehearsal for talking, your musicians will get used to that social environment and they will keep their habit of talking even when you expect them to focus. Make sure you are prepared enough to always know your next step and goal. Not sure how to prepare? Read our 3 Minute Rehearsals: 3 Steps to Preparation.

3. Stay on track with maintaining your leadership

Try to avoid constantly asking for their feedback or for their ideas. Of course, you can ask for people’s opinions or see if they have any questions they’d like to address, but avoid saying “do you want to run this again?” or “what do you guys want to do?” These types of questions immediately open the floor to all musicians to speak and try to be in charge. This is a surefire way to lead to distractions and a side-tracked rehearsal.

Do not ask the musicians what they want to do. Have a plan and stick to it. Once you give your position as a leader away, it’s very hard to get it back.

4 Times When You Can Skip Practising

No matter what you play, how long you’ve been playing, or where you are in your career, you’ve certainly been told that you need to practice. It’s true that practice makes progress. You can’t grow without it, and it’s essential to accomplish any of your musical goals. However, sometimes it’s okay to call it quits for the day (or the week). Here is your guilt-free list of reasons when and why it’s okay to take a break.


1. You’re in pain

No, not emotional pain from practising chromatic exercises for the 6th hour in a row. We’re talking about physical, potentially damaging, pain. Depending on your instrument, various kinds of pain can arise from overplaying or from playing with improper technique. If you’re experiencing any kinds of bad pain in your arms, chest, fingers, jaw, voice, etc., stop. Take a break, let yourself heal, and speak with your teacher or a colleague about what you might be doing incorrectly. Sometimes a simple posture or technique fix can help relieve pain and future damage.

2. You are mentally and physically exhausted

Everyone gets busy and tired, but if you are feeling absolutely drained, exhausted, and burned out, then it’s okay to take a day off. Don’t let your desire for a perfect practice record overshadow common sense; if you are too tired to make good decisions or practice intelligently, you could be doing yourself more harm than good. Exhausted but still want to practice? Do some long tones, slow exercises, and spend some time listening to your favourite music.

3. You can’t make noise at the moment

This is a valid excuse, sometimes. Living in a very un-soundproof apartment? Don’t have access to practice rooms? Practising at 2 am is not always an option.

Here are your alternatives:

  • Get a silent mute (for brass instruments) for those nights when you need to jam
  • Drummers, consider an electronic kit for practice purposes
  • Be proactive about scheduling out your day so you don’t run into any last-minute practice crises
  • Listen to your music (with headphones) and play along silently
  • Spend time away from your instrument. You can listen, compose, arrange, transcribe, or visualise your next performance.

4. You’re uninspired

At first, this might seem like a terrible excuse. However, we’ve all been there, and we understand. When you’re uninspired, bored, hating your music, and dragging your feet to make progress, the answer isn’t always ploughing through the same old routine and exercises.

Take a day off and reconnect to why you started your musical journey. Listen to some of your old favourite pieces of music. Watch videos or listen to recordings of your most proud musical accomplishments. Explore outside of your musical comfort zone and reach for new ideas and inspirations. Make a list of accomplishments you want to achieve in the next month, 6 months, and year. Look at the bigger picture and understand that mindlessly practising the same tired routine every day might not get you to your goals. Speak with your teacher about switching up your routine or chat with friends about how they stay excited. You’ll be back to the practice room in no time, and you’ll be inspired, excited, and making loads of great progress.

14 TIPS TO IMPROVE YOUR PRACTICE ROUTINE

If you’re a musician, you’ve undoubtedly spent hundreds, thousands, or tens of thousands of hours perfecting your craft. Practising and growing musically is a lifelong journey, and the day-to-day routines are full of highs and lows (no pun intended). Your time is valuable; are you making the most out of your practice time? Follow these 14 tips to make sure you are making the most out of your daily routines.

1. Set clear goals

Ever sit down to practise, pull out some books or charts, and begin to noodle and read aimlessly? It might be fun, but how well is your time being used? Every day, set clear goals for what you want to accomplish and how much time you want to practice. Create a plan for exactly what you will work on in that session. If you have solid long-term goals in mind, break them down into smaller chunks and create monthly, weekly, and daily goals for yourself. For example, if you have a piece you’d like to perform in 6 months that contains impossibly fast articulations, work backwards from the goal. Start practising it at half tempo today, and don’t move up your metronome until it’s sounding clean, clear, and consistent. Set a goal for a new tempo next week, and another for the week after. Approaching your practice session with clear goals and outcomes will help you practice more efficiently, accomplish more, and motivate you to return to the practice room every day.

2. Warm up

Make sure you give yourself a nice, long, level-appropriate warm-up. As a trumpet player, I cannot stress how many times I’ve watched trumpeters start their “warm-up” by squealing and clenching out their highest notes with a hefty big-band-lead-style shake. Be efficient and careful with your warm-up. If you’re not sure how to warm up, speak with your teacher or a colleague for appropriate exercises. Here are a few general guidelines that can help all musicians:

  • Start comfortably. The point of a warm-up is to gently ease yourself into playing and to literally warm up your body and your instrument for music making. Don’t start with any extremes: extreme range, extreme loudness, or extreme speed are all no-nos.
  • Grow from your comfort zone into your full capacity. This includes your range, various volumes, articulations, and speeds.
  • Incorporate non-instrument warm-ups. Many musicians do some sort of breathing exercise, stretching, or singing (for non-vocalists) during their warm-ups.

Again, speak with your teacher or another specialist on your instrument for help crafting your perfect warm-up. If you know how to warm up and you’re skipping it due to laziness, please reconsider that decision! Warming up can feel tedious at times, but it’s an incredibly essential way to set and build your fundamentals daily.

3. Eliminate Distractions

Resist the urge to check your texts in between exercises! If you are easily distracted by your technology, turn it off. Hide your phone in your backpack or instrument case and make a bet with yourself that you won’t look at it until you take a water break. Leave the room when you use your phone. Create phone-free vibes in your practice room so your temptations wane over time. If you are practising in a school where you are distracted often by friends walking by, or if you are nervous about who might hear you, create privacy for yourself by covering your window with a scarf or a piece of paper. If you often fall for these common distractions, you’ll be amazed at how much time you save once they are eliminated.

4. Record yourself

Here’s an exception to the put-your-phone-away rule: record yourself playing with whatever device you have available. Recording yourself is helpful in every scenario. You don’t have to be preparing for a big performance or audition to record and analyze your playing; you can record daily! Record yourself practising routine exercises and you might be surprised with what you hear. If you’re not hearing any obvious flaws, slow down your recording to 75% or 50% speed to hear more details about the accuracy of your diction, articulation, breathing, timing, etc. This can be one of the most humbling (and frustrating) exercises to practice, but it will help you grow faster than anything else. If you aren’t aware of your flaws, you won’t know how to change course to correct them.

If you have a performance or audition coming up, we recommend videotaping yourself both for audio analysis and to observe your stage presence and posture.

5. Use a pencil

For everything! Write in your music, and often. Don’t wait until you’ve made a mistake twice to write reminders or corrections. The more you practice something incorrectly, the longer it will take for you to unlearn the mistake and relearn the correct way.

6. Listen more

Besides listening to your practice recordings, take breaks to listen to professional recordings of the very best artists performing your instrument or your music. It’s always healthy and productive to get the “goal” sound back into your head after and during practising. Listen to music that represents the way you want to sound. The more you can reference back to these recordings, the more on-track your practice sessions will be.

7. Sing

If you are not a vocalist, take breaks to sing your music. Can’t sing? Hum it. You don’t have to sound great or have a good range, but you should be able to generally match the pitch of the notes in your music. If you can’t sing your music, go back to your instrument and try playing it more slowly. Don’t speed up until the music is ingrained in your head to the point where you can sing it to yourself. Sometimes with fast passages, it can be tempting to power through the notes with impressive fingering patterns and arpeggios – but make sure that you can identify and hear every single note without your instrument before speeding up to virtuosic tempos. If you need a moment away from your instrument, singing can be a great way to take a break while still working on your musicianship.

8. Take Breaks

Speaking of breaks, it’s super healthy to take an occasional pause in your practice routine! Spending hours in the practice room can be taxing, both mentally and physically. Make sure to take breaks occasionally: get out of your practice room, go for a walk, get a snack, have some water, sing, or check your texts (finally, phew). Please don’t see breaks as lazy or unproductive. Taking a few minutes away from your intense focus and letting your mind and body relax is so good for your productivity.

9. Sight Read

If you need a break from the same old exercises, take 20 minutes to sight read during your practice session. Sight reading is essential for your development as a musician, and it’s fun! Grab a friend and sight read some duets together. Sight reading with a friend can push you to be accountable, not give up, and work even harder than you might if you sight read alone. I find that when I sight read, I am focused so deeply in the reading that I stop over-analysing everything else like my breathing, my tonguing, or my posture. All of those things seem to fix themselves when I am intensely focused on just creating music. Sight reading offers a refreshing break from your practice session.

10. Use Multiple Approaches

Depending on your experience with various teachers, you probably have a variety of tools and problem-solving skills that you can use to tackle troubling issues while you practice. Be sure to always try new ways to tackle new problems. For example, if you’ve learned to use slow repetition as a way to conquer fast passages, you may find that the same approach does not fix a problem such as breath control or seamlessly jumping octaves in a melodic passage. Approach your own practising as if you were teaching a young student. Would you suggest the same approach to all of their issues? Definitely not. And what would you do if they presented a problem that you didn’t how to fix? You probably wouldn’t tell them to just keep repeating themselves until it gets better. And you definitely wouldn’t just shrug and give up on them. You’d most likely experiment, try some new things, and make educated guesses until the student begins to find improvement. Do the same for yourself. Don’t give up when you aren’t sure how to solve a problem. Explore, try new ideas, and you might surprise yourself with your knowledge and creativity.

11. Don’t be afraid to ask for help

Teachers, fellow students, colleagues, professionals, online forums, your fans, and Black Note Transcriptions are all here to help! Don’t be afraid to reach out for help if you are stuck. Whether you can’t get through a certain passage, you can’t tackle a song, you’re lacking inspiration, or you’re not sure where to start, it’s okay to reach out for help. Every musician came from the beginning and every musician has a network of supporters. With so much knowledge surrounding you and the convenience of our technologically globalised community, there are no excuses anymore!

12. Mix it up

Maybe you practice the same exact exercises every day, for the same amount of time, at the same tempo, at the same time of day….just the thought is putting me to sleep. Mix it up! Alternate days when you focus on certain materials. Incorporate some “fun” surprises in your routine, like a fun challenging piece, a jam with your friends, or an impromptu recording session of something you’ve been working on. Keep yourself motivated by always having something new and exciting to look forward to each day.

13. Be consistent

While you’re mixing it up, don’t forget to maintain consistency in your routine. If you have a routine of the essentials, stick with those, and then get creative with your remaining time. Stick to a schedule that allows you to practice every day. Without consistency, self-discipline wavers, leading to even less consistency, fewer results, and eventually, less motivation to hop back on the consistency train.

14. Don’t be too hard on yourself

Practising a skill can be stressful and at times, discouraging. Sticking to a routine every day can sometimes feel impossible. You’ll have good days and bad days. You’ll have days when you don’t get to practice because of unavoidable circumstances (sickness), and days when you don’t practice because you intentionally skip (laziness). Whatever happens, be nice to yourself. Some days you will sound terrible, and other days you will feel on top of the world. Keep consistent, be kind, and keep your eyes (and ears) focused on your goals.

8 Exercises to Train Your Ears

What musician doesn’t want stronger ears? Having stronger ear training skills positively impacts almost every aspect of your musicianship. If you want better tone, intonation, balance, blend, expression, compositions, or transcriptions, then ear training is for you. Here are 8 ways you can expand your ears today:

1. Sing before you play

If you are an instrumentalist, try singing your parts before you play them. You don’t have to have a beautiful tone or a wide range, but generally, you should be able to sing the notes that you are hoping to generate on your instrument. If you can’t match the pitches of your music, try singing something more simple. If you are struggling to meet pitches with your voice, this is a sign that your ears are weaker than your instrumental abilities. Practice singing and matching pitches every day and your ears will expand tremendously.

2. Chromatic scales

If you are comfortable singing and matching basic pitches, it’s time to move on to chromatic scales. In a comfortable octave within your range, slowly sing a one-octave chromatic scale up and down, starting and ending on the same pitch. Play the root note as a drone and hold it throughout the exercise to train your ears to sing the half-step intervals in relation to this base pitch. It’s harder if you sing the scale all on one seamless syllable, such as “oo”. This exercise will help with your pitch and your vocal control. Here’s what it looks like:

3. Interval exercises

Luckily for you, there are literally thousands of exercises that exist around training your ears to hear intervals. Most vocal exercises will give you some ear training development. You can even make up your own songs and games that focus on interval training!

Here’s a little game that will help you quickly learn to identify and sing your intervals:

  1. Write all of your intervals on flash cards, popsicle sticks, or something else that you can grab out of a bowl.(Intervals to write include: Unison, minor 2nd, major 2nd, minor 3rd, major 3rd, perfect 4th, tri-tone, perfect 5th, minor 6th, major 6th, minor 7th, major 7th, and octave)
  2. Write out the 12 note names on a different set of flash cards, or whatever else you are using.
  3. Sitting at a piano or with your instrument, draw one of each. The chosen note will be the first note of your interval. As quickly as possible, try to sing the chosen interval. Be sure to check yourself on your instrument in order to stay on track.

4. Perform in an ensemble

Joining a large ensemble can help you develop sensitivity, balance, intonation, and blend: all crucial ear training components. Join a local choir and make blending with those around you your number one goal. While singing, try to hear everyone around you louder than you hear yourself. Being a part of a large ensemble where you are not meant to stick out is crucial training for anyone who is serious about developing strong ear skills.

5. Start playing by ear

Make playing by ear a crucial part of your practice routine. Give yourself at least 10 minutes per day to jam to anything: a song on the radio, the bass line to a piece you know, or a song you’ve been working on. Playing without reading music is such an important skill to develop. Once you gain the confidence to play without always needing something to read, you will become an unstoppable improviser, insanely creative, and you will enjoy the freedom you have on your instrument so much more than you ever did before.

6. Change the pitch of your audio

We all have a handful (or hundreds) of favourite songs and pieces. Have you ever imagined what your favourite song would sound like in a new key? There are many apps and tools that can be used to change the frequencies of an audio track. I like to use the free, simple, Online Tone Generator.  Try uploading one of your favourite songs into this system, and listen to it shift as you choose what percentage or fraction of semitones you’d like it to change. This tool can help open your ears to new sounds, especially since you can listen to music in non-“western standard” keys. Have you ever heard a song in G# major and three quarters? There are an infinite number of “keys” available to the human ear, but we choose to tune our instruments and ourselves to just a handful. Expand your ears by taking your favourite song out of your sonic comfort zone.

Warning: this is highly addictive and insanely fun

7. Practice sight reading

Sight read, every day. With endless free music available to you online, there are no excuses to skip this crucial step in your development. Do it every day.

8. Practice transcribing

This tip is a hard one to commit to. Trust us, we know. Transcribing is exhausting, frustrating, and challenging, but the benefits to your musicianship feel exponential and inspiring. Not sure how to get started? Check out our 10 Transcription Tips or give us a shout if you need some additional assistance or advice. We’re always here if you need a little help.

Top Vocal Notation Mistakes

When you create music for any musician, it needs to be as readable and fool-proof as possible. You might not always be there when someone is reading the music that you wrote, and you won’t always be able to correct people if they misunderstand your writing. For these reasons, it is crucial to understand these top notation mistakes in vocal parts.

Vocalists have to sight-read both music and lyrics at the same time. Sometimes, multitasking while sight-reading can be tricky, especially if the music is not well written. While there are many common lyrical mistakes, let’s start first with common musical errors.

Musical

This treble 8vb-down clef is commonly used
  • Wrong octave

If you’re ever confused about which range a vocalist can sing, ask them.If you aren’t sure where on the staff to place the vocal melody you are writing, remember that voice is not a transposing instrument, and you can simply use the piano to find the correct sounding octave. There are many instances when a variety of clefs are used, including transposing clefs. For example, this “treble 8vb-down” clef shows music written an octave higher than it sounds. You’ll often find lead sheets sung by male singers or tenor parts in a choral setting using this clef.

  • Wrong clef

Once you’ve established that you are writing in the correct octave, make sure that the clef you’re using is the most appropriate clef for that music. Avoid using excessive ledger lines if an easier clef is possible. However, stay away from choosing any random clef in Sibelius; there are a lot of clef options in notation software, and many musicians will never use most of them. Stick to the common clefs that you’re sure the singers will be able to sight read.

Avoid using these “archaic” clefs unless your vocalists are expecting them
  • Wrong key and range

Don’t assume that all vocalists can sing in every range. One common mistake is for band leaders to give lead sheets of songs sung by male vocalists to females, and vice versa. While the singer might be able to reach those notes, the singer will not sound their best unless the music is in a key appropriate for their range. If you are organising any number of vocalists, make sure that you are writing in an appropriate range for their voices. If you aren’t sure, ask. Remember that as we age, our range changes drastically. A piece written for an operatic tenor will not be in an appropriate range (or skill level) for a 10-year-old boy. If you take the range and key into account when writing for vocalists, your vocalists will appreciate you for helping them sound their best and keeping their voices healthy.

  • Not providing the melody

This mistake is more common in pop and jazz settings; make sure you provide your vocalist with a melody. Very often, band leaders will bring a chord chart to a rehearsal and direct the singer to listen to the song and learn it by ear. While learning by ear is a great skill, it is disrespectful to waste the singer’s time in this way. What are they supposed to do at your rehearsal if they’ve never heard the song and they are finding out that they won’t be receiving music? Don’t waste their time; spend the time it takes and transcribe the melody for them. A very common mistake made by band leaders is assuming that vocalists do not read music well. Many vocalists are incredible sight readers, and if they aren’t, they will appreciate the respect you are showing them by giving them a chart just like everyone else in the band.

  • Only providing the melody

Avoid providing your vocalist with a chart that has only the melody. If the rest of the band has music with chord changes, form markings, rehearsal letters, etc., make sure to provide that information to the vocalist as well. All musicians, including vocalists, need as much information as possible to properly learn, analyse, and improve the piece while they prepare to perform. Make sure to also provide lyrics, when applicable. No singer wants to be sight reading a melody with no changes, while simultaneously trying to line-up the lyrics they just Googled on their phone.

  • Excessively complex writing

While it’s important to respect that vocalists are strong musicians and have reading abilities, it’s equally important to understand the limitations of the human voice. In order to sight read, vocalists need to have impeccable ears, strong relative pitch, and constant focus to multi-task between reading complex lines and pronouncing new foreign languages in a way that is both correct and conducive to the best technique. In short, vocalists have a lot going on. Make sure that you aren’t writing lines for them that are physically impossible or excessively complex. This is not to say that vocalists can’t sing difficult passages, just try to avoid fast two-octave leaps or insanely fast 32nd note chromatic runs.

  • Not considering breath needs

Vocalists need to breathe! Just like for horn and wind players, it’s essential to consider the needs of breath when writing for vocalists. Avoid extremely long notes and challenging passages that are not followed by a short rest for the vocalist to catch their breath.  

Lyrical

If your music is appropriate for the voice, it’s time to make sure that you’re writing in your lyrics correctly! Some of the elements we are going to unpack might not seem that essential, but if you were to read a piece of music without them, you would find yourself making mistakes and being a little bit confused. Very important: if you are using notation software, be sure to use the lyric function of that program rather than a basic text box function.

  • Slurs

Slurring vocal parts is crucial in helping vocalists visually and automatically understand the phrasing of a passage. We only have one rule:

Add slurs when two or more notes share the same syllable. Start the slur when the syllable is first vocalised and end the slur once that syllable ends.

This passage is missing slurs
This passage has slurs in the right places
  • Hyphens

Hyphens (-) are crucial when you have to split up a word with more than two syllables. For example, if I was going to write the phrase “All I ever think about is you”, and each syllable had a different note, the lyric would contain hyphens in between syllables, looking like “All I ev-er think a-bout is you”

This passage has awkward, odd lyric splits
This passage has good lyric splits, but it’s missing hyphens
This passage has great lyric splits and contains hyphens
  • Bad splits

When you’re splitting your words into multiple syllables, you can sometimes use common sense. Some splits will look really strange and unnatural.

For example, let’s split the words in the phrase “We’re gonna go swimming in October in Alabama”

Natural: We’re gon-na go swim-ming in Oc-to-ber in Al-a-bam-a.

Unnatural: We’re go-nna go swi-mming in O-ctob-er in A-la-ba-ma.

The more natural your splits, the more easily your vocalist will be able to read and pronounce the lyrics.

If you aren’t sure where to split your multi-syllable words, there is an extremely handy (free) tool online that will split your words for you in the most appropriate place. It works only for English texts. Try The Lyric Hyphenator!

  • No punctuation

Make sure you add all of the punctuation you would normally add when writing! If your singer is singing a question, but there is no question mark, how will they know to sing with the appropriate inflections? Add full stops, exclamation points, and everything else that you would normally include in when writing. Punctuation helps the vocalist properly phrase and communicate the text.

Why It’s Okay That You Were Rejected From Your Dream School

It’s that time of year again; the acceptance packages and rejection letters are rolling in, your parents and teachers are constantly asking for updates, and everyday you watch your peers experience both thrilling pride and crushing heartbreak. The university admission cycle is a huge time for you in your life, if you’ve chosen that the university path is right for you. As musicians, it’s easy to fall in love with the biggest, most beautiful universities with the famous teachers, gorgeous facilities, exciting connections, and hottest reputation.

Maybe you’re dreaming of a local university where you friends are attending, or maybe you’d love to attend the same university as your parents. Maybe you are the first in your family to attend college, and there is a lot of pressure riding on you to attend the very best school. No matter how we’d all love to see each other succeed and thrive at our dream college, we all know that college rejection is very real. If you’ve just been rejected, don’t quit. Here are our top 7 reasons why it’s okay that you got rejected from your dream school, and some tips for what to do now.

1. Maybe you aren’t ready

This might be brutally honest: maybe you’re not ready. And that’s okay! It’s very normal to apply for all the best schools without being 100% sure that you can thrive in their environments. This does not mean you’re a bad musician. Many of the best musicians in the world (top orchestral players, Broadway soloists, GRAMMY award winners, etc.) get their start at public universities. If this is a shock to you, then you’re missing out on a great secret: tons of public universities have absolutely astonishing music programs. Like, SO GOOD. It’s okay if you’re not in the top .001% of musicians your age right out of high school. You can get there. You won’t get there by attending a school in which you don’t belong. Imagine taking AP Calculus without ever learning Algebra; you would be overwhelmed, discouraged, and disappointed in yourself daily. If you think there’s a chance you would suffer in this dream school, be grateful for the rejection – it is pushing you towards a path on which you can flourish.

2. Your reputation will be okay

I understand the crushing pressure to get into a great school. Your friends, family, teachers, peers, (and even your competition), are all watching fiercely to see where you are going to attend. It’s true: some people will judge you for not getting accepted to the best school. Some people will celebrate that their competition (you) didn’t get into a school better than theirs. We can’t deny that this stuff happens. However, the people who really matter will be happy when they see you thriving at the school you eventually pick. They will also be happy to see you thriving if you decide not to attend school this year. After one year at college, you will have forgotten the names and faces of the people that you used to worry about.  After four years, one or more degrees, hundreds of friends, countless memories, huge achievements, and mentors for life, you will have forgotten any worries you had in high school about your university of acceptances. Time moves quickly, and the pettiness of high school judgement will quickly fade once everyone goes their own way. Here’s another secret: a lot will change after one year. A lot of your high school friends will change schools or drop out altogether. Some will decide to start families. Some will join the Peace Corps. Some will make a living off of a game show. Some will join the military. Some will tragically pass away. Everything is constantly changing. Be grateful for the options that you do have, and find an option that you’re committed to and love every day. Your reputation will be just fine. Also, you get to start over at your new school!

3. You will meet amazing people

In college, you will meet the most amazing people – friends, teachers, mentors, lovers, inspirations – and you’ll have these people for your entire life. You will find people who share your interests, inspire you, and push you to work towards your dreams. Do you ever feel like no one understands you in high school? Maybe people think that being a musician is a joke. Maybe your parents nag you for choosing a “dead-end” degree. Your friends and colleagues have all felt this way too, and they’ve come out stronger for it. Being immersed in an environment surrounded by people who want to see you THRIVE is one of the most liberating and inspiring experiences you can have.

4. Lesser-known schools can be amazing

Occasionally, there is excessive pride surrounding the “elite” universities. While they do offer amazing opportunities, world-class networking, and outstanding facilities, so do many other schools that you’ve not yet discovered.  Remember this: the teacher who will inspire you to new levels, change your life, and connect with you musically on a new level will have a greater impact on you than all of the “elite” perks that you might get at another, more popular school. Look for a game-changing teacher for you, and everything will be amazing.

5. You’ll be better off learning from peers and teachers who are at your level

If you can accept that you might not be ready for the rigorous expectations of your dream school, then you should also understand that being surrounded by amazing students and teachers who are more appropriate for your level is your greatest collegiate opportunity you can ask for. Of course, it’s great to be challenged and constantly motivated by your surroundings, but if you are thrown into an environment that is way beyond your level, you will be more discouraged than encouraged by your vast distance from those around you. There is no shame in accepting a university that fits your needs, and there is no shame in those universities for having students who are not yet at a prestigious, prodigious skill level.

6. You’ll be able to afford it (maybe)

Being rejected from a super fancy conservatory can be depressing, but your bank account will be celebrating. Going to a public university can still be very expensive, but in general, you will be paying less over time to attend. Unless you have a guaranteed college fund, you’ll be so glad when you’re not graduating with 400k+ in student loan debt from your dream school.

7. You can always apply there for grad school

Graduate school might not even be on your radar yet, but it’s important to know that most universities will have a graduate program that you can attend at any point after you get your first degree. Some students continue on to graduate programs immediately after receiving their bachelors, while others take some years or decades off to develop themselves, start their careers, and further develop their skills and passions. Graduate school might be a great time and place to reach your dream school goals.


WHAT TO DO NOW:

  • Don’t quit

Don’t write-off going to music school altogether. Hopefully, you auditioned for some other schools and have a “backup” school. If you don’t have any alternatives, or if you’ve unfortunately been rejected to every school, keep your eyes open for late application opportunities at other schools. If you need to take a year off to work and refine your skills and passions, that’s great!

  • Stay positive

Stay positive in your work ethic and goal orientation. Don’t beat yourself up for this loss. You’ll have many wins and many, many more losses in your career. If this is your first big loss, take this opportunity to learn and grow. You’ll only come out stronger in the end.

  • Take this as a good sign

This might seem cheesy, but take into consideration that better things may be waiting for you somewhere else. It might be hard to accept, but this rejection might be putting you right on the path to greater things.

  • Try again

If this really is the school of your dreams and you can’t live without it, try again next year. But don’t waste the next 9 months – get as much information as you can about the school and what they are looking for. You can always write the audition committee and politely request feedback from your audition. If you’re not already in touch with professors from your dream school, now’s the time to create that relationship. Don’t be offended if they don’t respond; sometimes they can’t or won’t give feedback. Find students from the school who study what you want to study and ask questions about the school and the program you’d like to enter. They will have valuable feedback on what is really demanded and expected from incoming students. Remember, stay positive, polite, and absolutely do not say bad things about the program for rejecting you.

  • Re-examine why it was reallyyour dream school

Now that you know you won’t be attending this school in the fall, how do you really feel about it? You might have some anger towards the institution, which is natural. Do you feel relieved? If you feel a deep sense of relief, then you might have been applying to this school for the wrong reasons. When you are accepted to a place where you really belong, you’ll feel excitement, wonder, pride, and a little good anxiety about what’s to come. An acceptance letter should never come with feelings of dread or huge amounts of unhealthy pressure. Separate yourself from the situation: did you apply because your parents/teachers/friends/siblings wanted you to? Are you trying to fill the shoes of someone else? Are you only trying to prove something to someone other than yourself? Getting distance from the idea of attending this school can give you some perspective on your intentions, which should help inform your next big decision.

  • Understand that sometimes, things just don’t work out.

That’s right – sometimes you aren’t going to get your way, even if you clearly deserve it. You might feel confused, disappointed, regretful, embarrassed, or even ashamed. Those are natural feelings. Use this time to practice, reclaim your voice, and prepare for the next big audition. You might never know if you really deserved your rejection or not, but all you can do is shrug it off, go practice, and make sure you’re even more prepared for the next audition.